Agent-user interactions are evolving from simple text exchanges to rich, interactive interfaces. Until recently, most conversations with AI agents were limited to walls of text. For example, you might ask an agent to find a holiday package to Bali, and it would respond with a list of options in prose. You’d then have to sift through the text to find what you wanted, and the agent would provide a link to book it elsewhere. This process was functional but lacked the interactivity and immediacy that modern users expect.
Generative UI changes this by allowing AI agents to build interfaces dynamically at runtime, tailored to each user’s request. This means agents can now render interactive elements like selectable lists, maps, or date pickers directly within the conversation. Implementing this capability requires two key components: a way to describe the UI and an agentic stack that connects the agent to your application and renders the UI.

What is A2UI?
A2UI (Agent-to-UI) is Google’s framework-agnostic open standard for Generative UI. It allows agents to describe interfaces as data, which your application can then render using the components you already have. A2UI is designed to be transport-agnostic, meaning it can work with any agent framework or backend.
Generative UI spans a spectrum of approaches. At one end, you can predefine components and have the agent select which one to render and with what data. This approach is brand-safe but limits customization based on user intent. At the other end, the agent can generate raw UI code (HTML, JavaScript, Dart) that renders inside a sandboxed iframe. This allows for maximum flexibility but risks deviating from your design system and executing untrusted code.
A2UI works across this entire spectrum. It supports controlled generation with decision models like Typesafe’s Jev and open-ended code generation that outputs A2UI JSON messages. The declarative mode, where agents assemble pre-declared components and functions, is the most popular. A2UI is the standard for declaring UI intent, enabling agents to generate UI from your existing component catalog using a common language.
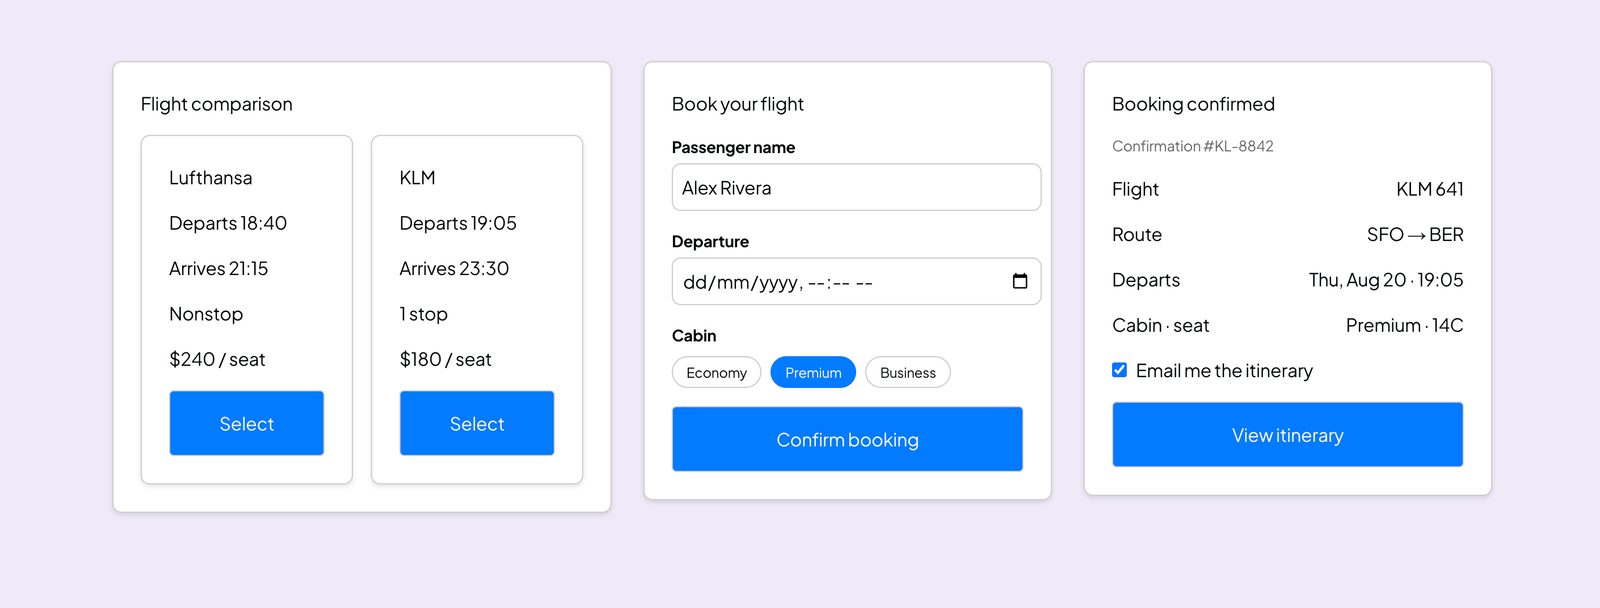
Key Features of A2UI
- Security First: A2UI is a declarative data format rather than executable code. The client maintains a catalog of trusted components, ensuring that anything the agent invents outside this set is caught before it reaches the screen.
- LLM-Friendly and Streaming: The payload is a flat list of small JSON messages that reference each other by ID. This allows the agent to emit the UI incrementally, and the client can render components as they arrive.
- Framework-Agnostic and Portable: A2UI responses can render through React, Lit, Angular, SwiftUI, Jetpack Compose, Flutter, and community renderers for Vue and even the terminal.
How A2UI and CopilotKit Work Together
CopilotKit provides the agent-integration stack needed to build user-facing agentic apps with A2UI. It supports A2UI payloads and provides Agent SDKs across many agentic backends, including LangChain, AWS Strands, and Google ADK.
Your agent emits A2UI operations, which AG-UI (Agent-User Interaction Protocol) carries to the client as typed events. When the user interacts with the interface, the values are sent back along the same stream. This bidirectional communication enables multi-step flows, where the agent can re-emit the UI based on user input.
Setting Up A2UI in Your App
Setting up A2UI involves connecting your agent to CopilotKit and defining which components the agent is allowed to use. Here’s an example using Google ADK:
from fastapi import FastAPI
from google.adk.agents import LlmAgent
from ag_ui_adk import ADKAgent, add_adk_fastapi_endpoint

root_agent = LlmAgent(
    name="flight_agent",
    model="gemini-3.8-flash",
    instruction="Help users find and book flights. Call generate_a2ui to show results.",
)

adk_agent = ADKAgent(
    adk_agent=root_agent,
    app_name="flights",
    user_id="demo_user",
    use_in_memory_services=True,
)

app = FastAPI()
add_adk_fastapi_endpoint(app, adk_agent, path="/")
On the client side, you register the endpoint with the CopilotKit runtime and define the components the agent can use:
import { CopilotKit, CopilotChat } from '@copilotkit/react-core/v2';
import {
    createCatalog,
    type CatalogDefinitions,
    type CatalogRenderers,
} from '@copilotkit/a2ui-renderer';
import { z } from 'zod';

const catalogDefinitions = {
    FlightCard: {
        description: 'A flight result with airline, times, and stops.',
        props: z.object({
            airline: z.string(),
            departs: z.string(),
            arrives: z.string(),
            stops: z.number(),
        }),
    },
} satisfies CatalogDefinitions;

const catalogRenderers = {
    FlightCard: MyFlightCard, // your React component
} satisfies CatalogRenderers<typeof catalogDefinitions>;

const catalog = createCatalog(catalogDefinitions, catalogRenderers, {
    catalogId: 'flight-catalog',
    includeBasicCatalog: true,
});

<CopilotKit runtimeUrl="/api/copilotkit" a2ui={{ catalog }}>
    <CopilotChat />
</CopilotKit>
Benefits of Running A2UI Over AG-UI
Every AG-UI integration inherits these benefits, so you don’t have to build them yourself:
- Minimal Server-Side Setup: The catalog reaches the agent on setup, so registering it on the client is all it takes.
- Generation in a Dedicated Sub-Agent: The catalog and protocol rules stay out of your main agent’s context window, and the surface streams to the client as the sub-agent produces it.
- Self-Healing Output: Invalid generations are caught, and specific errors go back for correction, ensuring nothing broken reaches the screen.
- Graceful Failure: When retries are exhausted, the surface resolves to a short message, and the conversation continues instead of dying in an error state.
Getting Started
To create a complete A2UI + CopilotKit application, you can use the following command:
npx copilotkit@latest create --name my-app --framework a2ui
This sets up a starter A2UI application with CopilotKit Agent integration. You can explore runnable A2UI demos in the CopilotKit Dojo, which includes examples of fixed server-side schema, dynamic schema against a custom catalog, and error-recovery scenarios.
Want to try all of this hands-on? Start with the free Claude Code from Zero course.
Source
Based on Google Developers' announcement, “Build Generative UI Apps with A2UI & CopilotKit Agents”. Written for people learning to build with these tools.